Magento 2 Size Chart Extension - User Guide
General Configurations
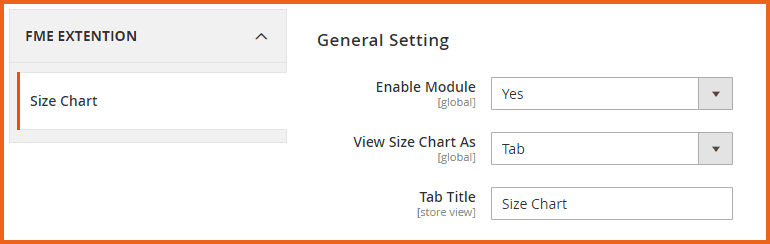
At the backend, go to FME EXTENSIONS > Configurations. Here you can find the extension configurations.
- Enable Module: Choose ‘Yes’ or ‘No’ to enable or disable the Extension
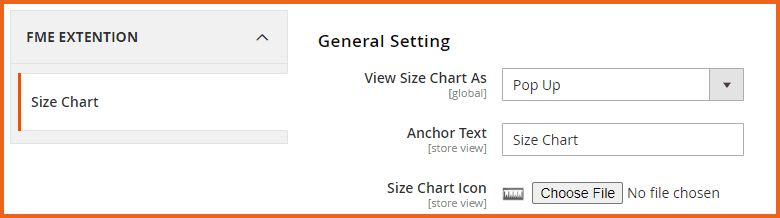
- View Size Chart As: Choose to display the size chart as a popup or in a tab.
Popup
This section allows you to customize the size chart popup.
- Anchor Text: Enter the text to be displayed as the anchor for the size chart.
- Size Chart Icon: Upload an image for the size chart to be displayed on the frontend.
(Note: Allowed file types: jpg, jpeg, gif, png, bmp)
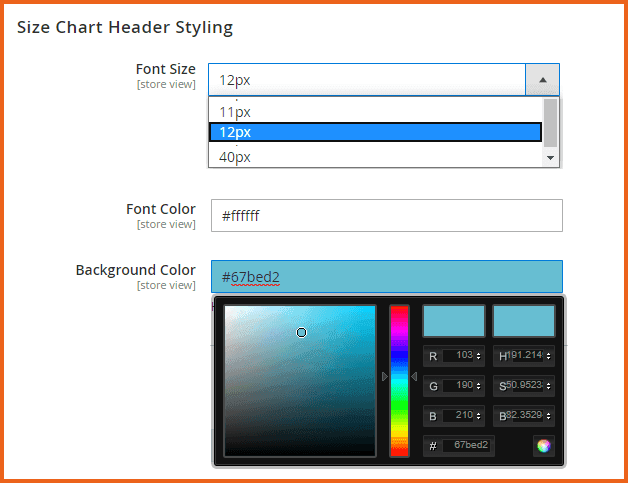
Size Chart Header Styling
This section allows you to customize the size chart header.
- Font Size: Choose the font size for the ‘Size Chart Header’ to match your theme's font scheme. The default size is 12px.
- Font Color: Select the font color for the ‘Size Chart Header.’ The default color is white (#ffffff).
- Background Color: Pick a background color for the ‘Size Chart Header.’
SIZE CHART BODY STYLING
This section allows you to customize the size chart body.
- Font Size: Choose the font size for the Size Chart body to match your theme's font scheme. The default size is 12px.
- Font Color: Select the font color for the ‘Size Chart Header.’ The default color is white (#ffffff).
- Background Color: Pick a background color.

How to Add Size Charts?
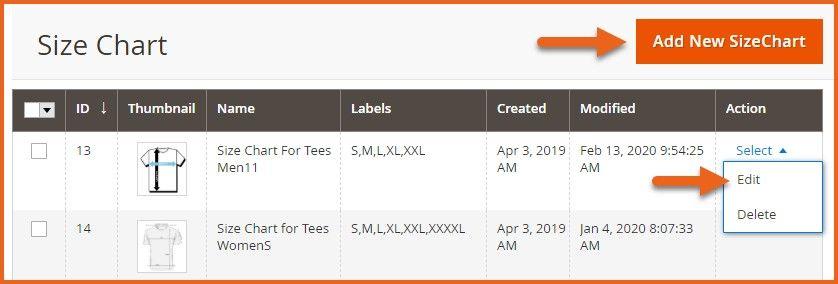
At the backend, go to FME EXTENSIONS > Manage Size Charts. Here you will find all the size charts in a grid. You can Edit them or click on the Add New Size Chart button to proceed.
Here you will have to provide the following information:
GENERAL INFORMATION
- Size Chart Name: Enter a name or heading for the size chart.
- Priority: Assign a priority value (e.g., ‘1’ for highest, ‘0’ for lowest). If multiple size charts share the same conditions, the chart with the highest priority will be displayed with the products.
- Status: Enable or disable the size chart as needed. Image: Upload an image for the size chart (allowed file types: .jpg, .jpeg, .png, .bmp).
- Store Views: Select the store views where you want the size chart to appear.

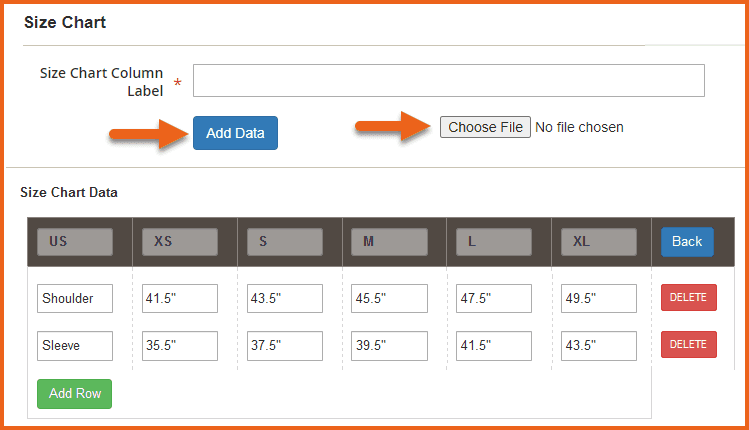
Size Chart Data
- Size Chart Column Label: Enter column labels for the size chart separated by commas (e.g., XL, L, S) or upload a .CSV file containing the column labels. You can add as many columns as needed using the "Add Data" button. Click the button and enter the name for the new column.
- If entering labels manually, separate each label with a comma (,) and ensure each label has a unique value (e.g., XS, S, M, L, XL).
- After entering labels, click the "Add Data" button to add rows and populate the size chart data. A table fieldset will appear for input.
- To use a CSV file, click the "Choose File" button to upload the CSV. The column labels and rows will be automatically set based on the file content. Data can be edited or added manually, or it will populate automatically from the uploaded CSV file.
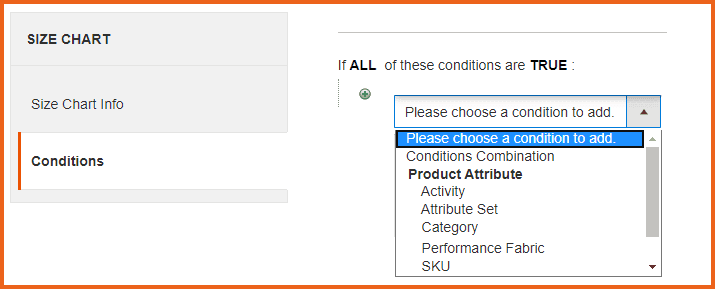
Conditions
This section allows you to enable the size chart for specific products.
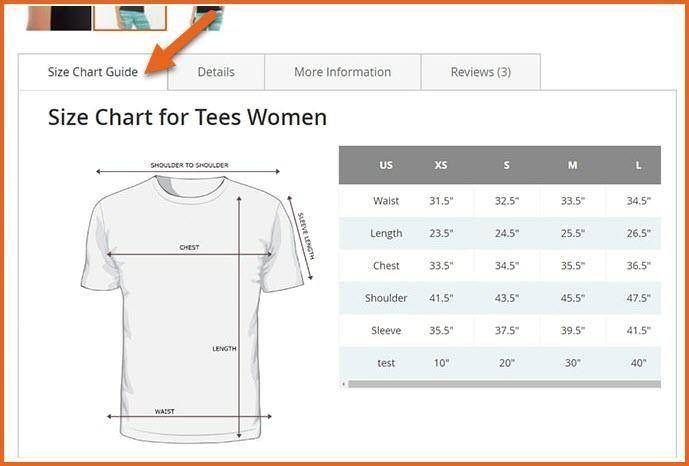
Frontend
Size Chart Popup

Size Chart Tab
GraphQL APIs
Fetch Size Chart Details
Query
{
 products(filter: { sku: { eq: "24-MB04" } }) {
   items {
     product_size_chart {
       chart_title
       popup_link_text
       frontend_icon
       chart_image
       header_font_size
       header_font_color
       header_background_color
       chart_body_font_size
       chart_body_font_color
       chart_body_background_color
       chart_data
     }
     sku
     name
   }
 }
}