User Guide of Magento 2 Free Request for Quote Extension
At the backend, go to FME EXTENSIONS > Configurations. Here you can find the extension configurations.
General Configurations
- Enable RFQ: Options to Enable / Disable module

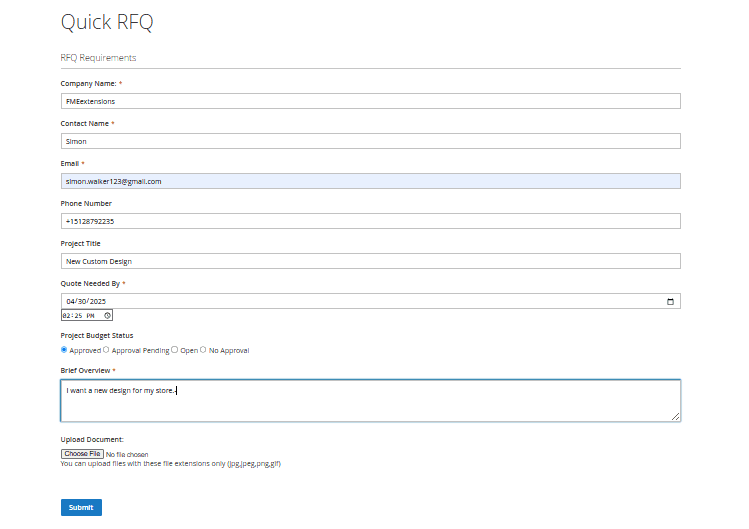
A 'Request for Quote' button will be added below the Add to Cart button on all products. Upon click the button, the following inquiry form will appear.
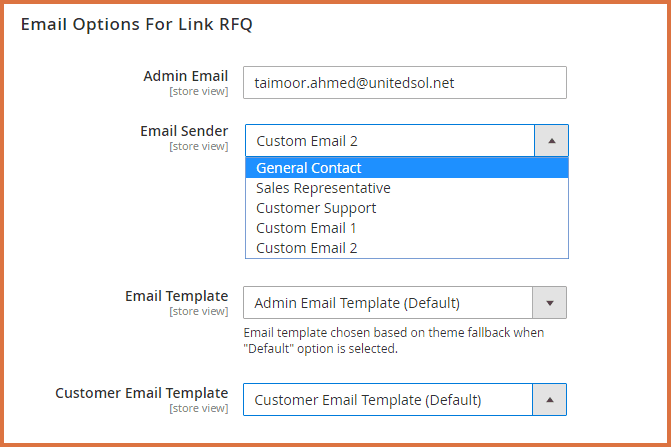
Email Options for Link RFQ (Request for Quote)
Admin Email: Option to set admin email Email Sender: Option to set sender of the email, sender option can be:
- General Contact
- Sales Representative
- Customer Support
- Custom Email 1
- Email Template: Option to choose an email template
- Customer Email Template: Option to choose the customer email template
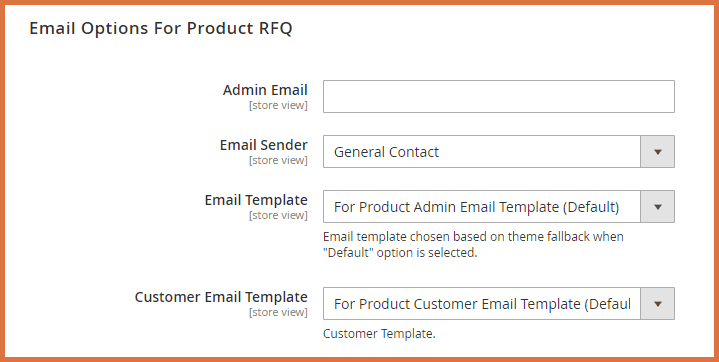
Email Options for Product RFQ
- Admin Email: Option to set admin email
- Email Sender: Option to set sender of the email, sender option can be:
- General Contact
- Sales Representative
- Customer Support
- Custom Email 1
- Email Template: Option to choose an email template
- Customer Email Template: Option to choose the customer email template
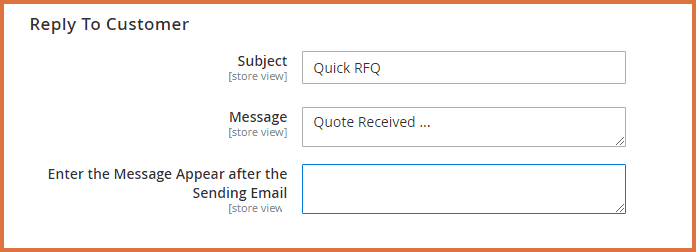
Reply to Customer
- Subject: Option to write the subject of the email
- Message: Option to write a message which you want to send to the customer as a response (body of the email)
- Enter the Message Appear After Sending Email: Option to enter the message which will appear after sending the email
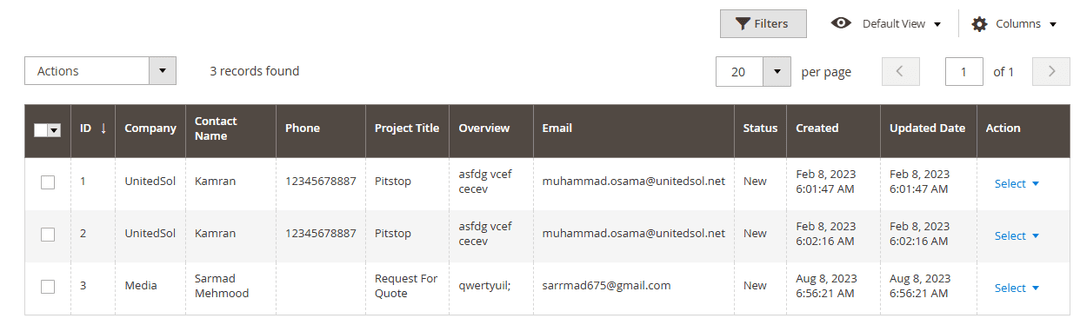
Now, at the backend go to FME EXTENSIONS > LINK QUICK RFQ. There you will find all the link inquiry forms which are being submitted by customers.
GraphQL APIs
1. Get All Submitted Request for Quotes Data
query {
  quickrfqs(pageSize: 10, currentPage: 1) {
    items {
      quickrfq_id
      company
      contact_name
      email
      phone
      project_title
      date
      budget
      prd
      overview
      status
    }
    total_count
    page_info {
      current_page
      page_size
      total_pages
    }
  }
}
2. Get Request for Quote Through ID
query {
  quickrfq(id: 1) {
    quickrfq_id
    company
    contact_name
    email
    overview
  }
}
3. Insert New Record
mutation {
  createQuickrfq(input: {
    company: "Test Company"
    contact_name: "Test User"
    phone: "1234567890"
    email: "test@example.com"
    project_title: "Test Project"
    overview: "This is a test RFQ"
    status: "New"
  }) {
    quickrfq_id
    contact_name
    status
  }
}
4. Update Record
mutation {
  updateQuickrfq(id: 1, input: {
    contact_name: "Updated User"
    status: "Pending"
  }) {
    quickrfq_id
    contact_name
    status
  }
}
5. Delete Record Through ID
mutation {
  deleteQuickrfq(id: 1) {
    success
    message
  }
}